Domain RegistrationFind and register the perfect domain for your website.
 .COM DomainChoose a widely recognized domain to build global credibility.
 All TLDsFind and register your perfect domain. Choose from local and global extensions.
 whoisCheck domain ownership details, expiration dates, and registrar information.
 US DomainRegister a .US domain and build trust in the USA.
 Web HostingEverything your website needs to run smoothly
 WordPress HostingWordPress hosting that just works
 Windows HostingReliable hosting for Windows environments
 Reseller HostingTurn hosting into your business
 Email HostingEmail that looks professional and works anywhere
 cPanel HostingFull control of your hosting with cPanel
 Affiliate ProgramJoin as a partner and earn commissions on every referral you send our way.
 Vps HostingScalable virtual servers that expand as you need.
 Dedicated ServersGet complete access and full control over your dedicated physical server.
 Managed vpsNot tech-savvy? We will take care of everything with our fully managed VPS hosting for you.
WordPress is a content management system (CMS) that enables easy installation of plugins and themes. Changing your WordPress theme is a straightforward process that will give your blog a new look. It could be the key to shaping your brand’s identity. However, many users are afraid to change themes for fear of losing their content or settings. Fortunately, there are numerous actions you can take to ensure a smooth transfer and avoid losing any critical content. In this piece, we will discuss how to change a WordPress theme without losing content.
Your WordPress theme determines how your website and brand are shown to visitors. As a result, you should put some thought into selecting the WordPress theme that best suits your brand’s identity.
WordPress themes are available in both free and premium versions with various features.
Reasons to change WordPress themes.
Whether you run an online store, a blog, or a service-based website, you may need to consider changing your site’s appearance or functionality. It may be that you need a new look to complement a brand update. Perhaps you wish to stay current with new, trendy design trends or you need to increase your site’s speed or add useful features. Below are some reasons why you may change a WordPress theme.
i). Present your visitors with a new, cutting-edge design that complements your current branding.
ii). Make full use of the latest WordPress features and upgrades.
iii). Incorporate recent changes in Google SEO ranking variables, such as mobile-first design.
iv). Meet ADA or WCAG accessibility criteria without the need to hand-code solutions.
v). Use page layouts and new block kinds to bring appealing content to your site quickly and effortlessly.
vi). Improve the speed of your website with more optimized code.
• Ensure your site’s security if the developer no longer supports your theme.
However, despite the benefits, here are some instances that could make changing themes more difficult:
I). Your website was created with a custom, theme-dependent page builder.
II). Your website’s extra functionality, such as custom widgets, shortcodes, or post kinds, may be lost if you change themes.
III). Your site has special blocks or plugins that were supplied with the theme.
Steps to Changing WordPress Theme Without Losing Content
Step 1: Back up your website.
Before making any modifications to your website, you should back up your material. This ensures you have a backup of your website in case something goes wrong during the theme switch. You may quickly back up your website using a plugin such as UpdraftPlus.

Step 2: Migrate content as needed
There are some circumstances, in which your new theme may have different content areas or settings than your previous theme. In this instance, you may have to manually move parts of your content, such as widgets or custom post kinds.
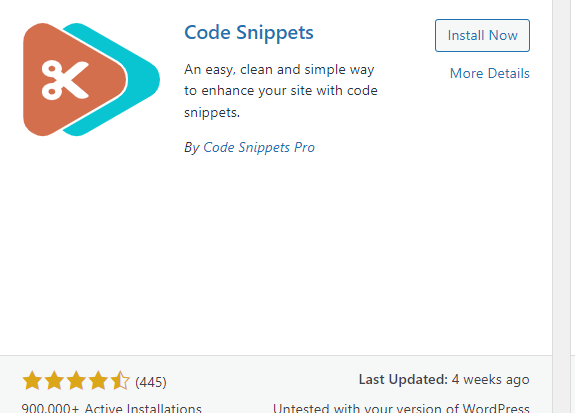
a). Check your existing website for any custom PHP code.
Examine your current theme files for any custom code, especially in the functions.php file. Copy code snippets to a local file and paste them into your new theme. Alternatively, install a plugin like Code Snippets to make functionality independent of the theme.
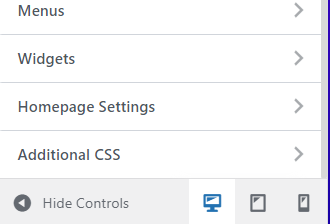
b). Check your existing website for any custom CSS code.
Look at your existing theme for any changes you’ve made to the CSS code that may affect site functionality. Copy any important modifications to a local file so that they can be incorporated into your new theme. To segregate additional CSS code from your theme, use the “Additional CSS” box in the WordPress Customizer.
c). Save any tracking codes.
This contains Google Analytics monitoring code and Facebook pixels. Simply copy these to a different file and re-add them to your website.
d). Capture a snapshot of any widgetized sections.
Widget areas, such as footers and sidebars, are the most likely to be lost during a theme update. Take screenshots of the widgets on your dashboard so they may be easily recreated following the move.
Step 3: Use a Staging Site
If you have access to a staging site, test the new theme there before implementing it on your actual website. This will allow you to make any necessary changes and ensure that your content displays properly under the new theme.
Step 4: Select a new theme.
After you’ve backed up your website and moved vital content, you may begin looking for a new theme. The WordPress theme directory and third-party marketplaces both offer thousands of free and premium themes. To avoid compatibility difficulties, ensure that you select a theme that is compatible with your current WordPress version.
When selecting a new WordPress theme, consider the following:
✔Functions that wouldn’t tie you down.
Themes that provide a lot of extra features, such as custom post kinds or page builders, may appear to be a wonderful all-around offer. However, selecting this theme makes it much more difficult to swap later on. You’ll be forced to stick with this theme to maintain crucial functions. This could become a security issue if the developer ceases to provide support or updates in the future. If you do not use all of the available capabilities, it may cause your site to run slower than necessary.
So, in many circumstances, it’s best to hunt for a theme that gives only a layout and use other plugins to provide the functionality that you need.
✔Active maintenance and support.
Make sure you select a theme that is constantly updated to function with the most recent version of WordPress. That holds whether you choose a free or premium option. You’ll also want to choose a theme that provides support, whether through an open forum or a private ticketing system.
✔Modern Design Techniques
This includes not just a beautiful visual style, but also one that is constructed with modern browsers in mind, such as mobile-first design, the use of WordPress blocks, and the implementation of accessibility standards.
✔Positive reviews.
Reviews are typically the best indicator of a theme’s quality. Discover what genuine people have to say about design, usability, speed, functionality, and support.
Step 5: Install and activate the theme.
▪️Install the new theme.
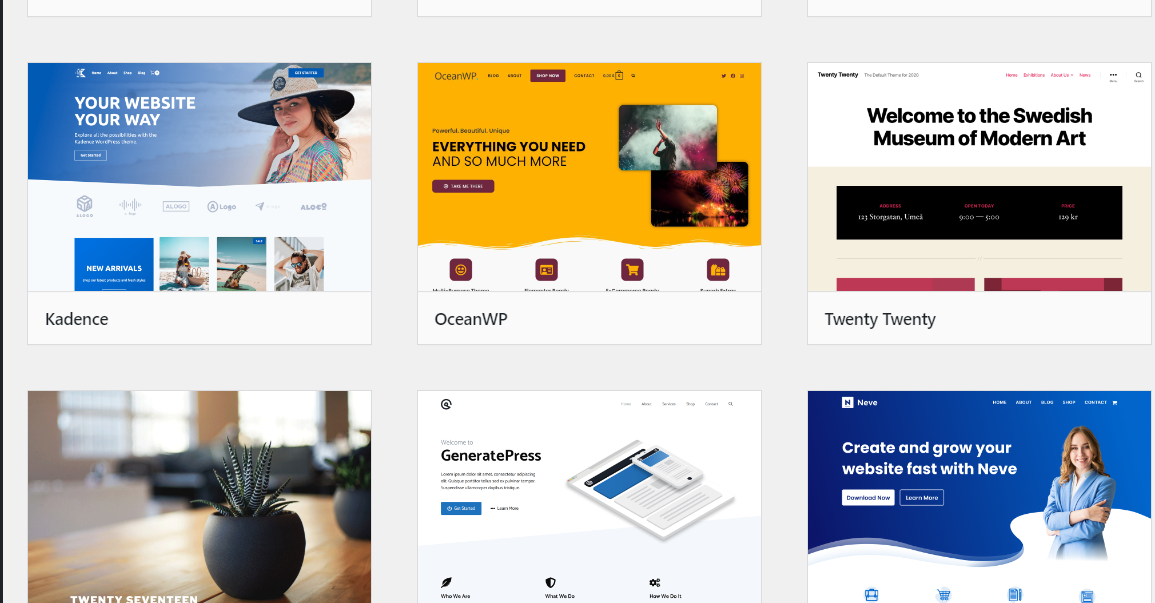
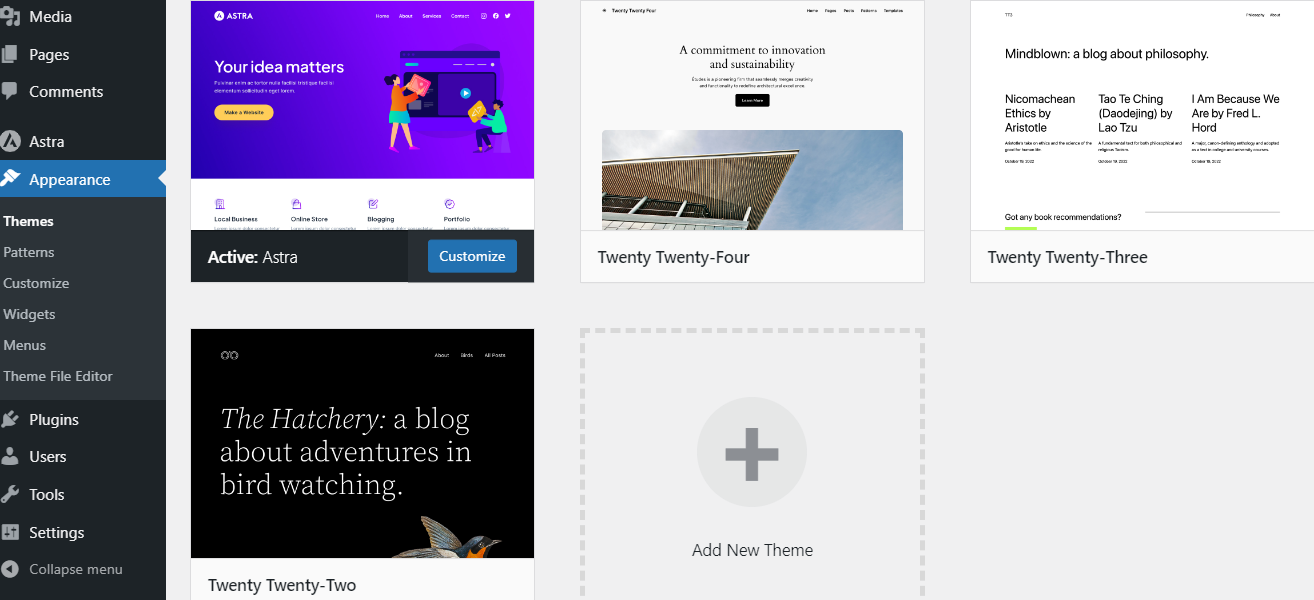
To create a new WordPress theme, navigate to Appearance → Themes and select the “Add New” button at the top. You can either upload your new theme’s ZIP file here or if your theme is in the WordPress directory, use the search feature to locate and install it.
▪️Display your theme.
From the dashboard menu, select Appearance → Customise.
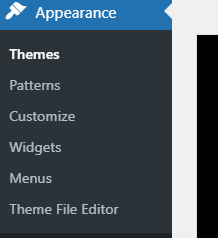
Your current theme will be mentioned at the top left. To display all installed themes, click the “Change” button next to their names.

Click the Live Preview button under your new theme.
Don’t worry if the new theme creates an odd version of your site with missing material. You can easily fix it once it’s operational. Now, just take note of any obvious issues that need to be addressed, and make sure the theme can be viewed without serious errors.
▪️Make the switch
To deactivate the existing theme and activate the new one, click the Change button at the top of the Customizer menu (left).
Step 6: Customize the New Theme
After you’ve enabled the new theme, you might have to modify it to fit your branding and preferences. Most themes have customization choices for colors, fonts, layouts, and other elements. Take your time adjusting the settings until you’re satisfied with the appearance of your website.
Step 7: Test Your Website
After customizing the new theme, you should test your website to confirm that everything is operating properly. Check your pages, posts, photos, menus, and plugins to ensure they are properly displayed. You may also want to test your website on various devices to guarantee it is responsive.
After changing WordPress themes, it is important to follow these steps:
1. Rebuild any pages that lost content during the switch, paying special attention to custom block areas.
2. Fix any custom shortcode issues that may have arisen.
3. Add any required custom code to your new theme files.
4. Test your site on different devices and browsers to check for layout problems.
5. Once everything looks good, push your staging site to your main site and remove the maintenance mode page.
6. Run a final speed test to ensure the new theme is functioning properly in comparison to the original benchmarks.
Conclusion
Following these steps allows you to change your WordPress theme without losing any content. Remember to back up your website before making any changes, select a compatible theme, customize it to your desire, and test it to check that everything works properly. With some thought and preparation, you can easily give your website a new look.