In (CWP), creating a user account allows you to manage hosting resources for individual websites or domains. Each user account is isolated, meaning users can manage their domains, databases, emails, and other resources separately since they will have separate cPanels.
Prerequisites: #
- CWP (CentOS Web Panel) installed and configured on your server. You can refer to these steps
- Root or reseller access to the CWP admin panel.
- A valid domain name pointing to your server’s IP address via DNS.
- A valid domain name whose account you wan t to add.
Step 1: Log in to the CWP Admin Panel #
- Access your CWP admin panel. If you do not know how, please check these steps
Step 2: Navigate to “New Account” #
- Once logged in, go to the User Accounts section on the left-hand menu.
- Click on New Account to start creating a new user.

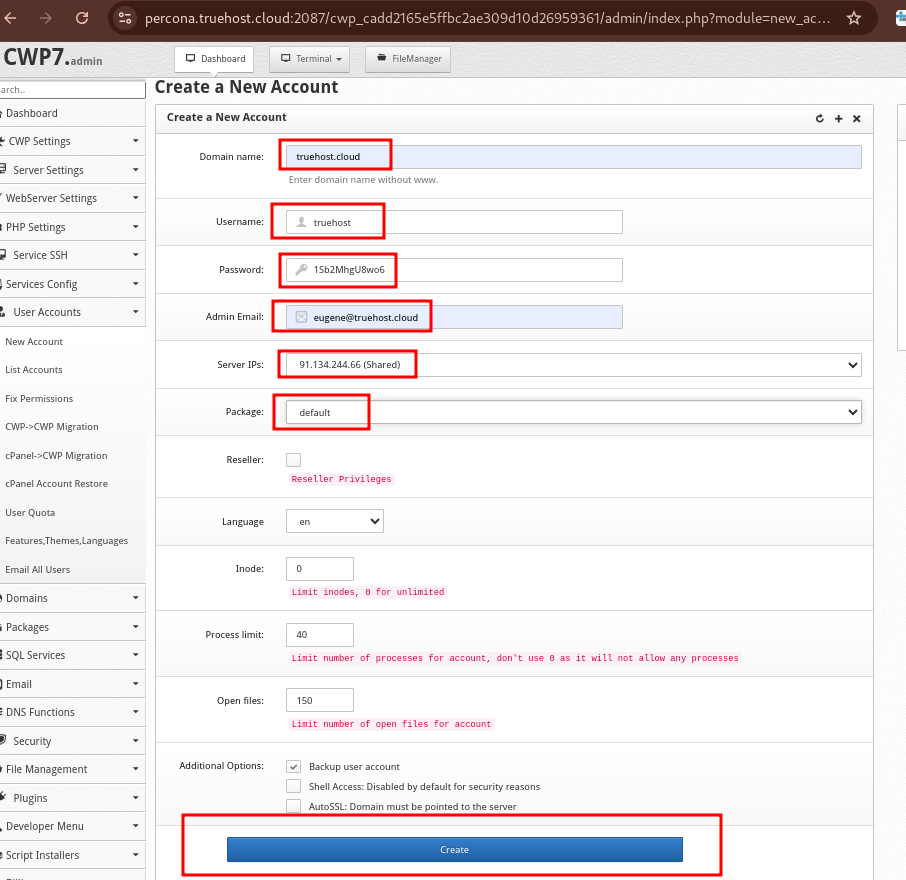
Step 3: Fill in User Account Details #
You will now see a form to enter the details of the new user. Here’s what to fill in, but some are optional:
- Domain: Enter the domain name you want to associate with this user (e.g.,
yourdomain.com). - Username: Enter a unique username for this account. This will be used to log in to the user panel and for FTP access (e.g.,
user123). - Password: Choose a strong password for the user or click Generate to have CWP generate one for you.
- Email: Enter the email address of the user (or leave it as root’s email if you’re managing the account).
- Package: Select a hosting package from the dropdown list. Hosting packages control resource allocation such as disk space, bandwidth, and the number of domains the user can create. You can set up hosting packages in Packages > Add a Package.
- Quota (MB): Enter the disk space quota for the user in megabytes (MB) if not defined by a package (e.g.,
1000for 1GB). - Limit No. of Processes: Set the maximum number of processes the user can run.
- Inodes Limit: Set a limit for the number of files the user can create (optional).
Step 5: Create the Account #
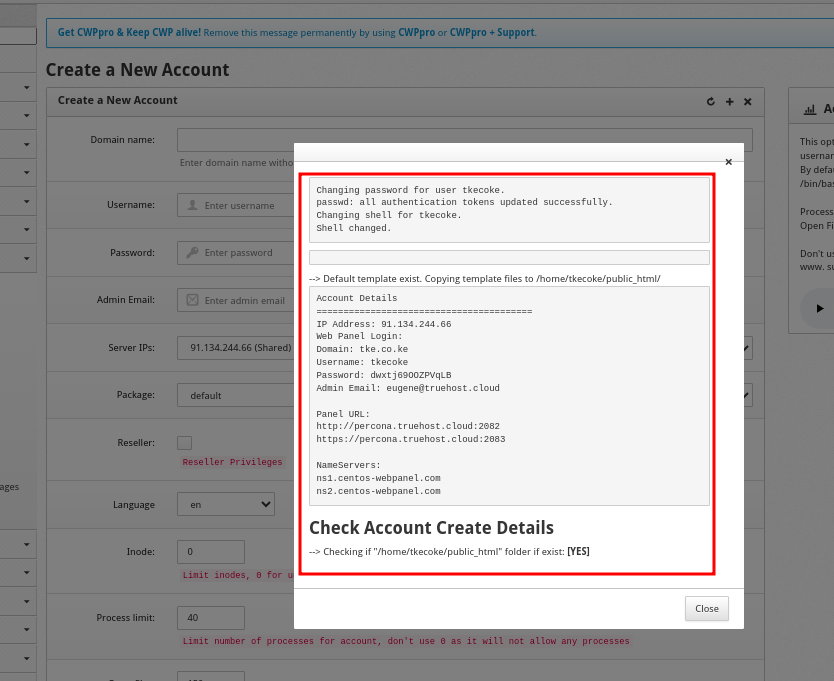
- Once you’ve filled in all the details, click Create.
- CWP will process the request, and you should see a success message confirming the creation of the account.
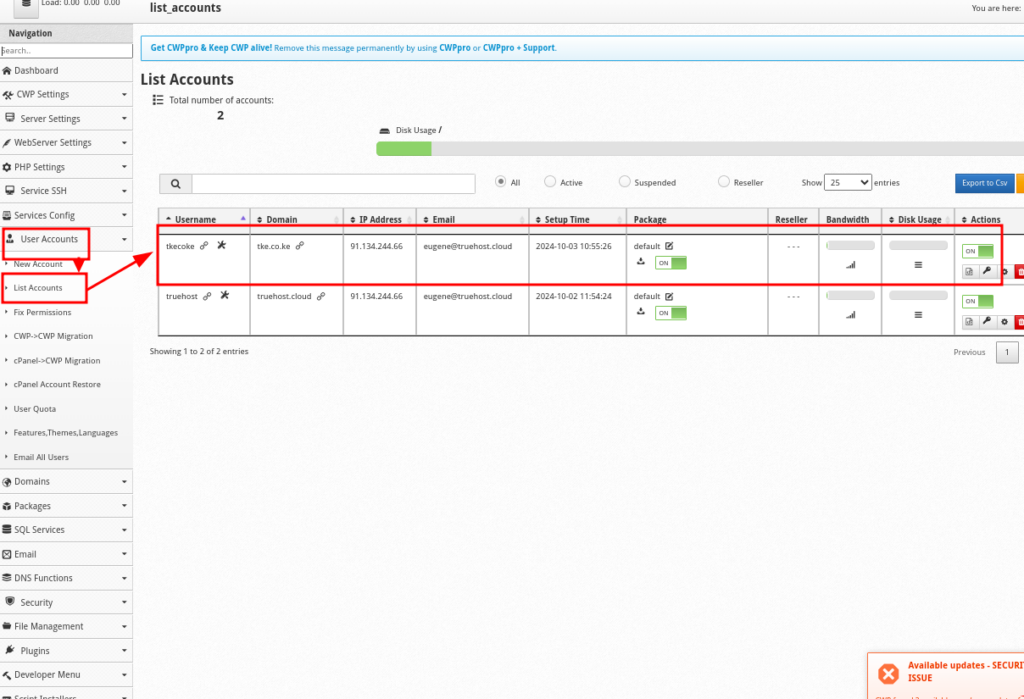
Step 6: Verify the User Account #
- After creating the account, you can view it in the User Accounts > List Accounts section
- The newly created account should be listed with details such as username, domain, and assigned resources
Step 7: Log in to the User Panel
The new user can log in to their CWP User Panel using these steps