Emails can be migrated between cPanels, in different ways. You can use the cpanel interface, you can use the command prompt or you can use migrations tools like imapsync.
This article will guide on how to move email data in very simple steps.
Prerequisites #
- You will need access to both the source and the destination cpanels
- If you are moving emails to an addon domain on the new server, then you need to create the addon there
Step by Step on How to Migrate Email Accounts Between cPanel Servers #
Backup Email files on the current server
- Log in to the source cpanel. This is usually done using any of the URLs below;
https://yourdomaain_name:2083

https://yourServer_name:2083

https://cpanel.your_domain_name
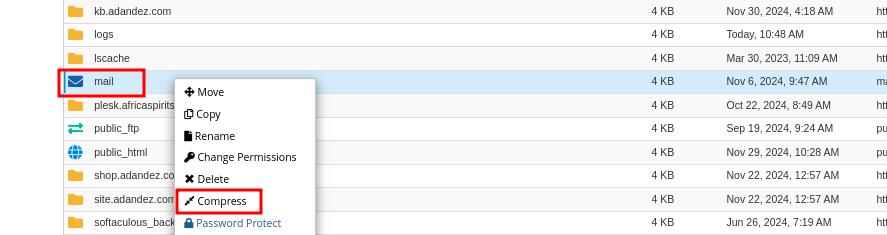
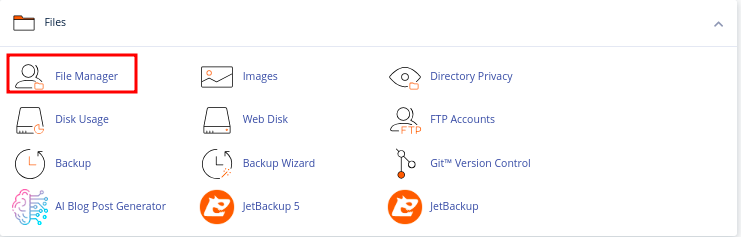
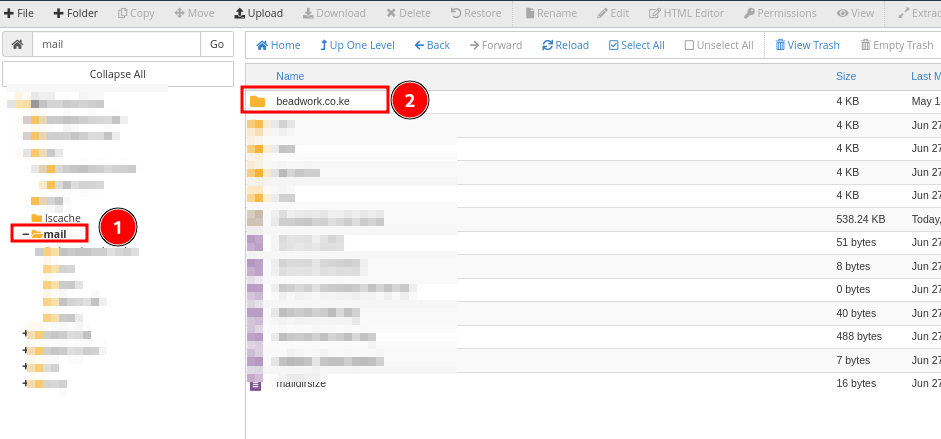
- Navigate to Files >> File Manager

- In file manager, locate a directory called mail. That is what stores email data
Step A. If you want to move all emails, then right click on the mails directory, and click on Compress. If you want to move just one domain’s email, then jump to Step B below.
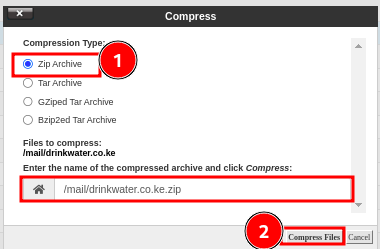
- Choose a compression type. You cab use .zip or .tar.gz then click on Compress Files
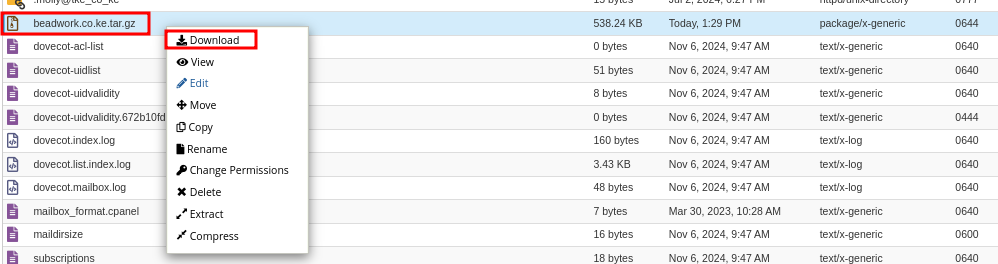
- Let the process happen to completion, the right click on the compressed file and download it to your local computer. Note that download speed will vary depending on the size of the file and your internet speed.
Step B. If you have addons domains on the cpanel, and you want to move emails for just one domain, then enter the mail folder and instead compress the folder for the domain whose emails, you want to move.

- Next we will backup the email password and configuration file. Other than than compressing the mail directory.
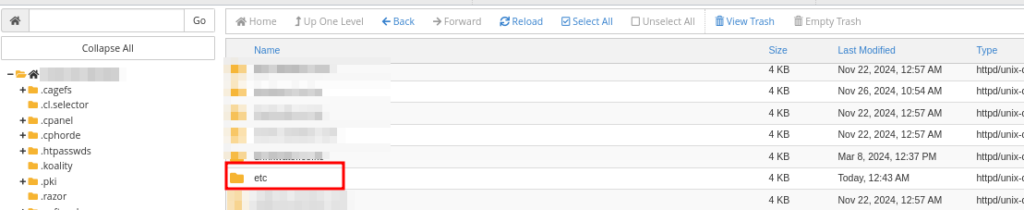
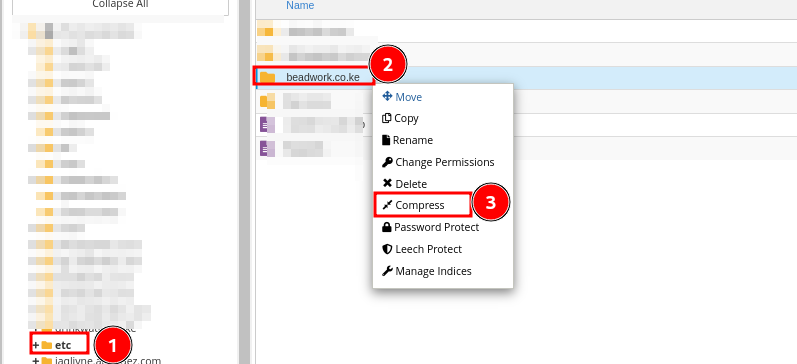
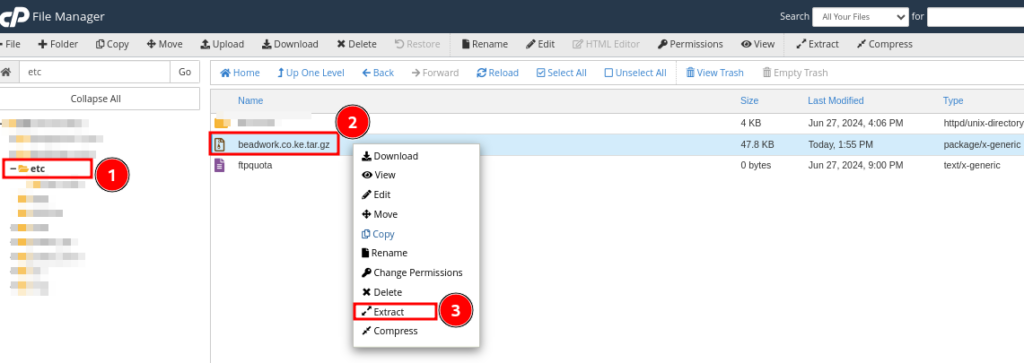
Step C: Proceed and compress the etc directory, also found in File Manager. Do this, if you compressed the entire mail folder in the above step. If you are moving emails for one domain, jump to Step D
- Once done, right click the file and download it to your local computer.
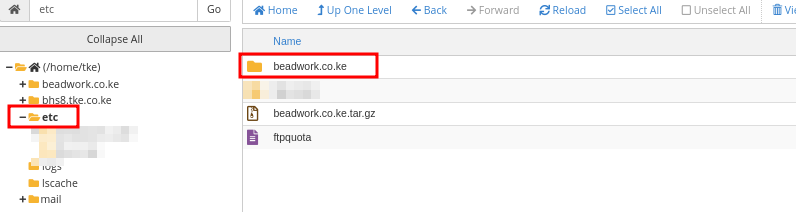
Step D: If you compressed a particular domain’s folder in the mail folder, then similarly here, enter the etc directory and compress the folder for that domain, then download it to your computer.
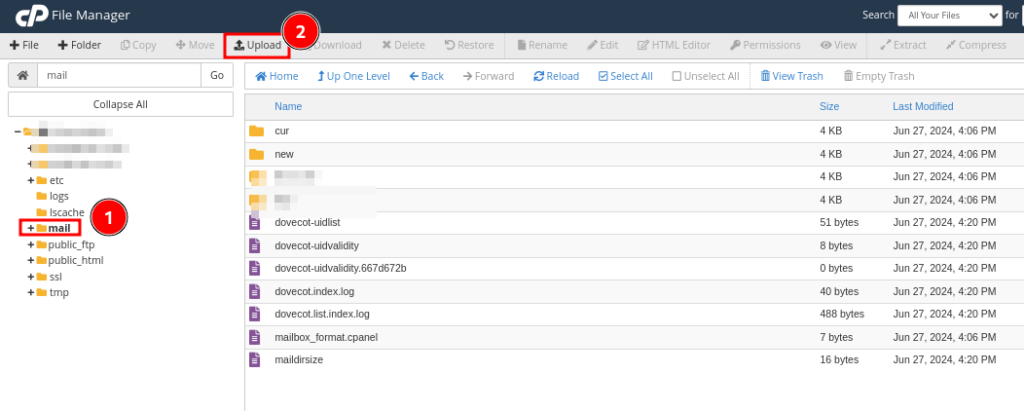
Upload Email files to the new server
At this point, having gone through the above steps, I expect that you have you email and etc compressed files downloaded to your local computer. You need to uplaod the files, to same locations, on the new server
- Log in to the cpanel of the destination server
- Navigate to Files >> File Manager
- Note here, you will uplaod the files that you downloaded to the same locations that they were, but now on the new server.
Part 1: If you compressed mail and etc directories in the source server’s file manager, then upload their compressed files to same location, on the new server, otherwise jump to Part 2 below. Note that upload speed will vary depending on the size of the file and your internet speed.
Part 2: Same case, if you had compressed a particular domain’s folder in mail and in etc of the source server then uplaod them in same locations on the new server. This is what I did, and so I will access etc folder of the destination server and uplaod there, a file that I compressed from etc of the source server.
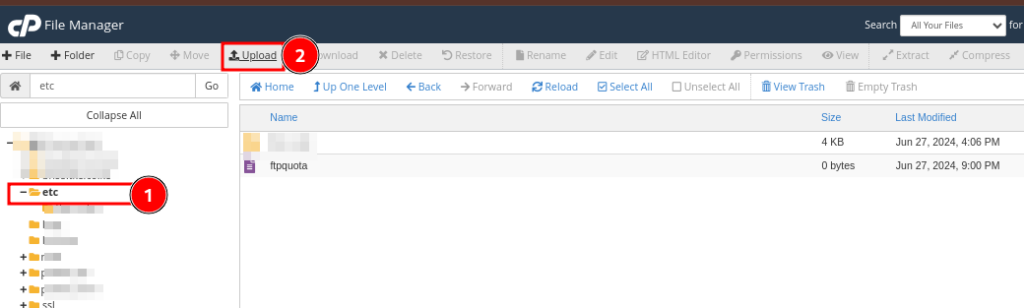
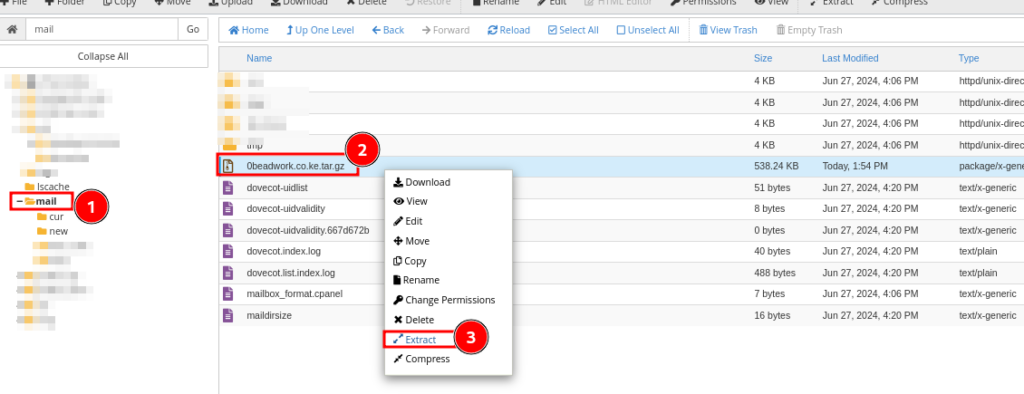
- Once uploaded, extract the file there.
I will also access mail of the new server and upload there a file that I downloaded from mail of the source server, then extract it
- That way, without any other configurations or manual creation of mailboxes, your emails should be moved and should now appear in your List of emails
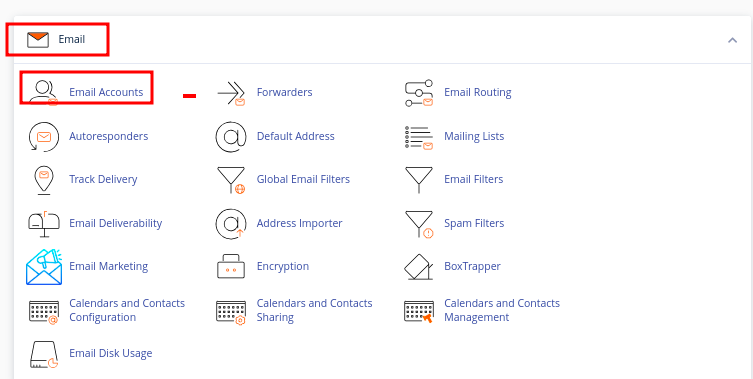
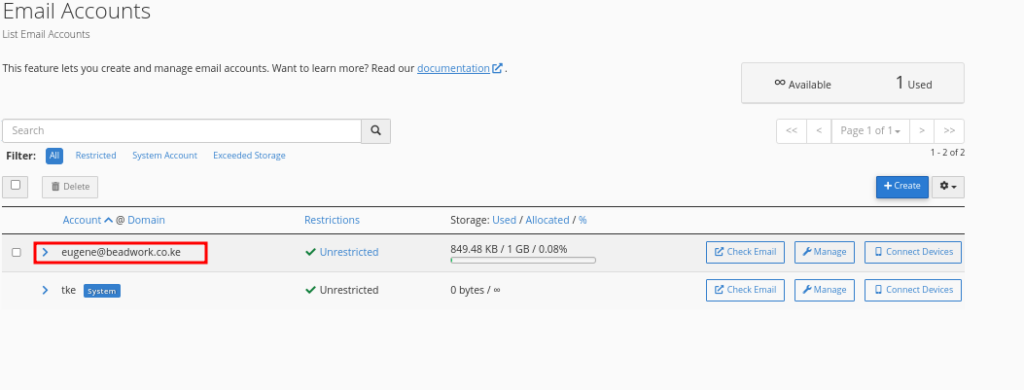
- Navigate to cPanel’s Home >> Emails >> Email Accounts to see the migrated mailboxes.
- I had one email, an I can now see it in the new cPanel without creating it manually
- You now need to update email DNS of the domain to point to the new server to avoid adding email data on the old server.
Dear readers, this is a life-hack. A short, simple, and thus fast method of moving email accounts between cpanel servers, and I hope it has helped you and schooled you too.
Cheers!