 Domain RegistrationFind and register the perfect domain for your website.
 .COM DomainChoose a widely recognized domain to build global credibility.
 All TLDsFind and register your perfect domain. Choose from local and global extensions.
 whoisCheck domain ownership details, expiration dates, and registrar information.
 US DomainRegister a .US domain and build trust in the USA.
 Web HostingEverything your website needs to run smoothly
 WordPress HostingWordPress hosting that just works
 Windows HostingReliable hosting for Windows environments
 Reseller HostingTurn hosting into your business
 Email HostingEmail that looks professional and works anywhere
 cPanel HostingFull control of your hosting with cPanel
 Affiliate ProgramJoin as a partner and earn commissions on every referral you send our way.
 Vps HostingScalable virtual servers that expand as you need.
 Dedicated ServersGet complete access and full control over your dedicated physical server.
 Managed vpsNot tech-savvy? We will take care of everything with our fully managed VPS hosting for you.
WordPress is a powerful content management system that enables users to construct and publish their websites easily. As a WordPress user, you may need to hide your website, pages, or posts temporarily or permanently. As a result, site owners must understand how to unpublish a WordPress website and individual pages or posts.
This article will show how to unpublish a WordPress site, page, or post.
Why Unpublish a WordPress site?
Typically, when you create a website on WordPress, you publish pages and posts to share them with visitors. However, there are situations where you might need to hide certain pages from view. This could be because you want to revamp your site’s direction or if a page was accidentally published.
It’s important to understand how to properly unpublish a WordPress site. Unpublishing doesn’t mean deleting your site; it’s more like hitting the pause button, allowing you to make necessary changes without the pages being visible to others. Here are some common reasons why you may want to unpublish a WordPress site:
1. Making updates
If you need to make significant updates to your site, you may want to unpublish certain pages or posts while you work on them.
2. Rebranding
If you are rebranding your website or changing your business focus, you may want to unpublish certain pages that no longer align with your new branding or messaging.
3. Temporary content
If you have time-sensitive content that is only relevant for a specific period, you may want to unpublish it once the event or promotion is over.
4. Security reasons
If you suspect that a page or post on your site has been compromised or contains sensitive information, you may want to unpublish it temporarily while you address the security issue.
5. Testing and experimentation
If you are experimenting with different layouts or content on your site, you may want to unpublish certain pages or posts while you test different configurations.
Overall, unpublishing a WordPress site can be useful for managing your website content and making necessary changes without permanently deleting it.
How to Unpublish Your Entire WordPress Site
Unpublishing your entire WordPress site can be achieved through various methods, depending on your requirements. Here are some common approaches:
#1. Changing Site Visibility Settings
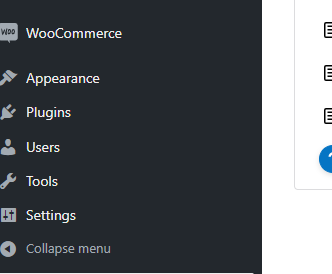
To unpublish your entire WordPress site, simply go to the left side of your admin dashboard and select the Settings option.
This method temporarily prevents search engines from indexing your WordPress site. Follow these steps to adjust your site’s visibility settings:
*Access Settings
– Log in to your WordPress dashboard.
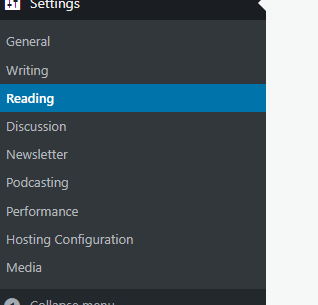
– In the left-hand menu, navigate to **Settings**
and then select **Reading**.
*Modify Visibility Settings
– On the Reading Settings page, locate the section labeled Search Engine Visibility.
– Check the box next to Discourage search engines from indexing this site. Enabling this option adds a `noindex` directive to your site’s code, signaling to search engines that they should not index your site’s content.
*Save the Configuration
– Scroll down to the bottom of the page.
– Click the Save Changes button to apply the new settings.
These steps will ensure that your site is temporarily hidden from search engine results. Remember, this does not guarantee immediate removal from search indexes, as search engines need to re-crawl your site to update their listings.
#2. Using a Maintenance Mode Plugin
One of the simplest ways to unpublish your WordPress website is by putting it into maintenance mode using a plugin.
When you unpublish a WordPress site, it won’t appear under its URL or in search results. However, it may still be accessible through third-party archives on the web. You can use plugins like WP Maintenance Mode and Coming Soon, Website Builder by SeedProd, and others to manage your WordPress site during the unpublished period.
To use a maintenance mode plugin, follow these steps:
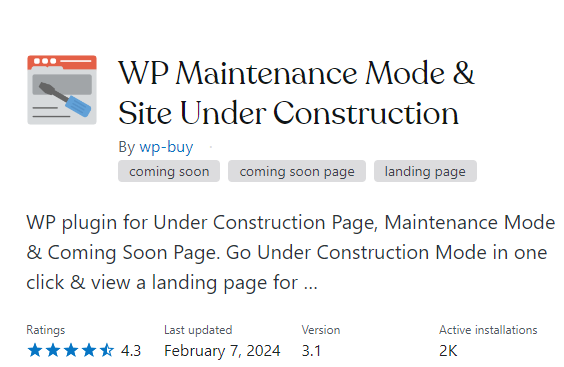
▪Choose a plugin such as WP Maintenance Mode & Coming Soon or Website Builder by SeedProd.
▪Configure the settings according to your preference.
▪Hit the Save and Publish button once you’ve finalized your choices.
Your website will display a maintenance mode page while the rest of your content remains unpublished. You have a few maintenance mode options:
✔Coming Soon
If you select the Coming Soon option, a Coming Soon page will be displayed to visitors.
✔Private
If you select the Private option, your site will be locked and visible only to you and certain logged-in users.
To make your website public again, simply switch back to the “public” option in the plugin settings.
#3. Password Protecting Your Site
Another method to secure your entire site is by using a plugin like Password Protected
*Install and Activate the Plugin
Go to Plugins> Add New, search for Password Protected, then click Install Now and Activate.
*Configure the Plugin
Navigate to Settings > Password Protected. Enable password protection and set a password.
*Save Changes
Save your settings. Your site will now be inaccessible to visitors without a password.
Unpublishing Specific Posts and Pages on WordPress
WordPress makes it easy for users to unpublish certain posts and pages, removing them from public view while retaining the option to edit and republish them later. Here are a few methods to unpublish a WordPress page on your website.
Unpublish a Single WordPress Page
Unpublishing a page allows you to take it offline while keeping it available for future edits and republishing. The simplest way to unpublish a page is to switch it to draft mode.
Steps to Switch a Page to Draft
1. Navigate to Pages → All Pages in your WordPress dashboard.
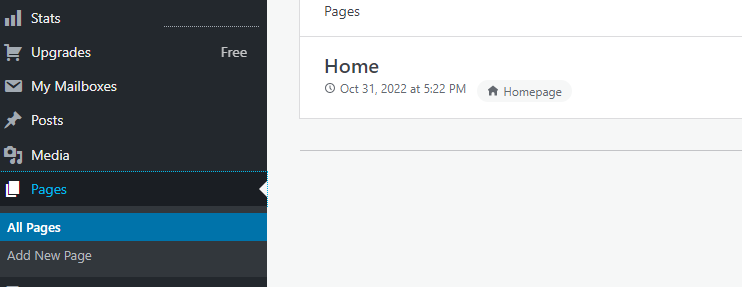
2. Hover over the page you want to unpublish and click the Edit link.
3. In the post-editing screen, click the Switch to Draft option.
4. A popup will appear asking for confirmation. Click the OK button.
Your page will now be a draft. You can view all your drafts by going to All Pages → Drafts.
Deleting a Page
If you no longer need the page or it’s outdated, you can delete it entirely. This is akin to moving a file to your computer’s recycle bin.
In the post-editing screen, click the Move to Trash button in the right-hand menu.
Your page will then be moved to the trash, where it can be permanently deleted later.
Unpublish Multiple WordPress Pages at Once
If you need to unpublish or delete multiple pages, perhaps because you’re revamping or relocating a website, you can do it all at once rather than one by one.
1. Navigate to Pages → All Pages from your WordPress dashboard.
2. Check the box next to each page you wish to unpublish.
3. Click the Bulk Actions drop-down menu, select Edit, and then click Apply.
4. In the Status drop-down box, select Draft and click the Update button.
All selected pages will now be unpublished.
To move multiple pages to the trash, choose Move to Trash from the Bulk Actions drop-down menu and proceed accordingly.
Making a WordPress Page Private or Password Protected
When developing a WordPress website, you frequently create and review new content to determine which pages most effectively drive user traffic and improve SEO.
To prevent unauthorized access or modifications to your content before it’s ready for publication, it’s essential to protect these pages.
By default, WordPress pages are set to Public, allowing anyone to view them.
So, how can you secure your page with a password?
Fortunately, WordPress provides a simple built-in option to do this.
*Navigate to the Page
Go to the page you want to password-protect.
*Change Visibility Settings
In the right-hand menu under the Visibility section, click on Public.
*Enable Password Protection
Select the Password Protected option and enter your chosen password in the box.
*Save Your Changes
Click the Update button to apply the changes.
Now, when visitors access the page, they will be prompted to enter the password.
Tips For Unpublishing Your WordPress Content
Here are several tips for unpublishing your WordPress content effectively while minimizing the impact on your site’s SEO:
1. Consider Archiving Instead of Unpublishing
Use an archiving plugin like LH Archived Post Status to archive posts and pages. This keeps them accessible via direct links and preserves internal linking and SEO efforts.
Note that setting a post or page to Draft removes it from Google’s index, which can negatively impact your SEO.
2. Repurpose Your Content
Instead of unpublishing, revamp outdated content. Research competitor content, update information, and improve your material to make it more engaging.
Transform blog posts into infographics, videos, or newsletters. Merge related posts into comprehensive guides with updated statistics and insights.
Optimize repurposed content for current SEO algorithms by updating keywords, meta descriptions, and headers.
3. Assess the Impact on SEO and User Experience (UX)
Unpublishing content can lead to broken links and 404 errors, affecting both SEO and UX. Implement 301 redirects to guide visitors to relevant content and maintain SEO integrity.
If you need to keep content private from both visitors and search engines, navigate to Settings → Reading in your WordPress dashboard. Check the box next to Discourage search engines from indexing this site and save changes.
By considering these strategies, you can manage your WordPress content more effectively, ensuring minimal disruption to your SEO and user experience.
Conclusion
Managing the visibility of your WordPress site or individual pages and posts is straightforward and can be done with just a few clicks. Whether you want to temporarily hide your entire site or permanently remove specific content, WordPress provides the tools you need to handle these tasks efficiently.
To keep your site relevant and valuable to your audience, it’s essential to regularly review and update its content. This includes checking for outdated or unnecessary material and taking action such as updating, unpublishing, or deleting as needed.
Following these steps allows you to effectively control your WordPress site’s visibility, ensuring that only the desired content is accessible to your audience.